Introduction
This intro hands-on web workshop will explore these questions and topics:
- What is your web content? Who is your intended audience?
- Login to navigate WordPress dashboard and public view
- Add text, links, and visual content to a page
- Modify theme appearance with customizer
- Design your site to match your content and audience goals
- WordPress platforms and alternatives, and domain names
- Who can answer WordPress questions at Trinity?
What is your web content? Who is your intended audience?
Talk with your team to identify a practice web project that you will work on today, such as:
– a faculty research site for web visitors interested in topic
– a humanities partner site for Hartford-area residents
Today each team will create a temporary public practice site on the Action Lab’s WordPress site. We will remove your site at the end of the day (unless your team requests to leave it up and export it elsewhere this month.) Please share one computer per team during this workshop and discuss your decisions together.
Login to navigate WordPress Dashboard and Public View
Follow the paper instructions you have been given to login to your practice site, where you have been granted administrator access. Explore the Dashboard features:
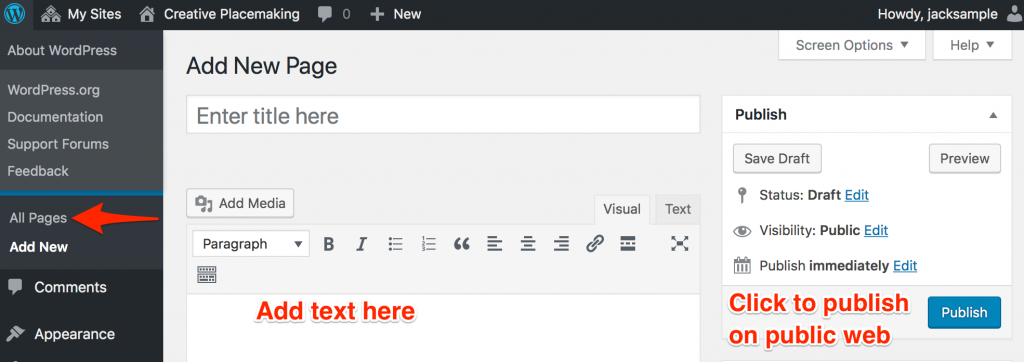
Pages > All Pages. Create a new page, add a short title and text, and Publish.
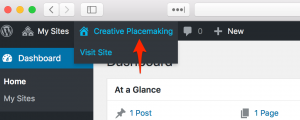
Float mouse over home symbol/site name and control-click to open “Visit Site” in a new tab. This allows you to make edits on the back end (Dashboard) and view changes on the front end (your public site). Always refresh your front-end browser tab to see the latest updates.
Add text, links, and visual content
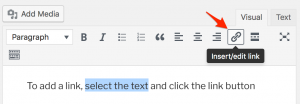
Links: Inside your page editor, select text, click the link (chain) symbol, and insert web address
Images: Inside your page editor, insert the cursor where you want the image to appear, click Add Media button, and select the image file (JPG or PNG or GIF). Add a title and caption and provide the source credit (and link). Inserting an image in academic work WITHOUT source credit is a form of plagiarism.
If you need to capture a screenshot of an image from your computer screen:
- Mac computers: hold down SHIFT-COMMAND-4; or download Skitch tool
- Windows: Start Button > All Programs > Accessories > Snipping Tool
See instructions for other devices at https://en.wikipedia.org/wiki/Screenshot
Videos: Insert a YouTube or Vimeo URL directly into the page editor, like the one below, and it will automatically appear as an embedded video:
https://youtu.be/Gl3uIRYYUmI
See the result below. Remember to type a caption with source credit (and link) directly into the text below the video, since there is no caption box (as there are for media images).
Video by the Liberal Arts Action Lab (2018)
PDFs: This WordPress site uses the Vanilla PDF embed plugin to display your PDF file as an embedded scrollable image in your WordPress page. If you have a copy of the PDF file:
- Upload the PDF to your WordPress Media Library, similar to an image
- In the Media Library, click the PDF icon to open its properties
- Copy and paste the long URL to the uploaded PDF file
- Paste the long URL directly into the WordPress editor window, like this:
https://action-lab.org/wp-content/uploads/2018/04/sample.pdf
See the sample result below. If you need to change the size of the PDF display, see more detailed instructions on the Vanilla PDF embed plugin website.
What if my content does not appear? Beware that secure https websites may not display content from non-secure http sites due to “mixed content” browser errors. If you suspect this is a problem, ask for help.
https://action-lab.org/wp-content/uploads/2018/04/sample.pdf
Footnotes: This WordPress site uses the Easy Footnotes plugin. Inside your text, simply enclose the footnote inside these bracket shortcodes:
Your text will appear as shown below, with a footnote number automatically displayed. Float over the cursor to see the note in a tooltip, or click to view the note at the bottom of the page.
Here’s my sentence 1
iFrame interactives: This WordPress site uses the iframe plugin to display an interactive web page from one site (such as an interactive chart or map) inside your WordPress page or post. Learn more about the iframe concept at https://www.datavizforall.org/embed/
Copy the iframe embed code for your interactive chart or map. For example, see this screenshot of the embed code for a map on Social Explorer:
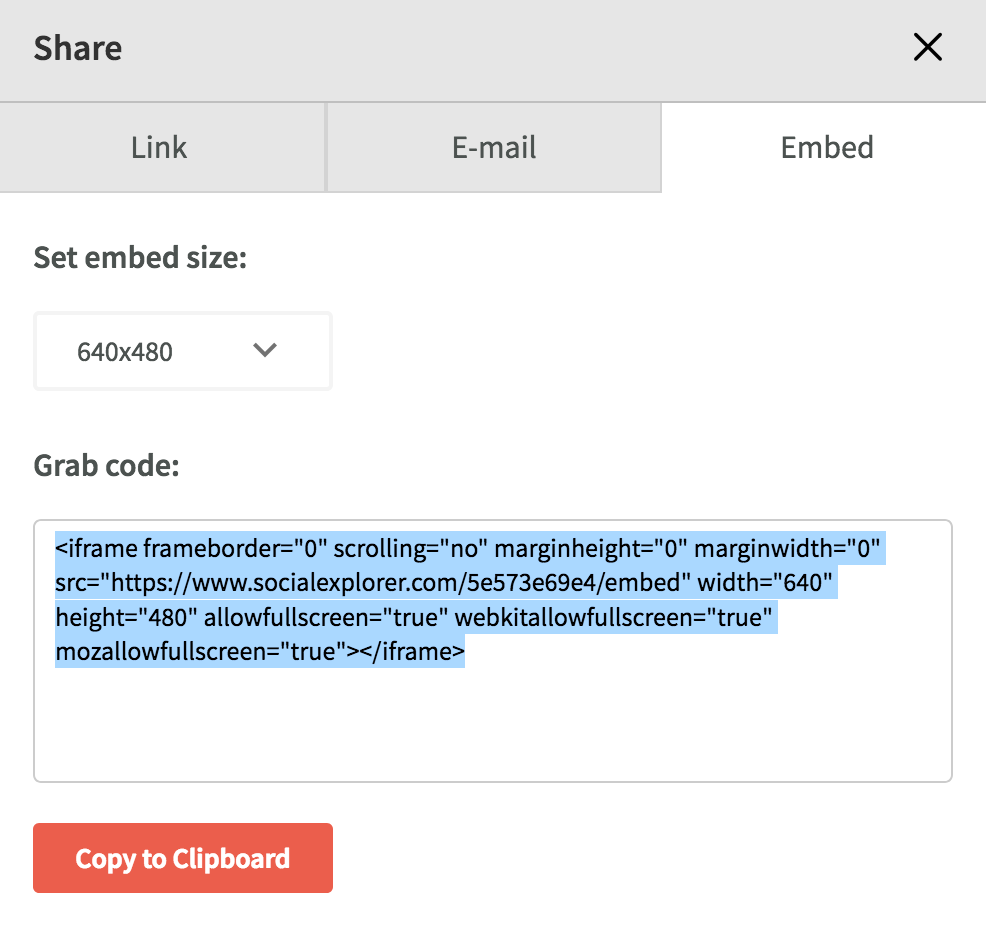
Paste the embed code into your WordPress editor window, and modify the iframe code as shown below:
- At the front end, replace the less-than symbol
<with an open bracket:[ - At the back end, remove the entire iframe end-tag, and replace the greater-than
>with a closed bracket:]
Your modified iframe code should appear similar to the image below:
Your iframe may contain some optional elements (such as frameborder, marginwidth, scrolling, etc.) The only required elements are the src (source url), along with the width and height (in pixels or percentage, such as “100%”). This means that you can also embed an interactive chart or map from another URL inside your WordPress site.
The end result should look similar to this embedded interactive map:
Modify Theme Appearance with Customizer
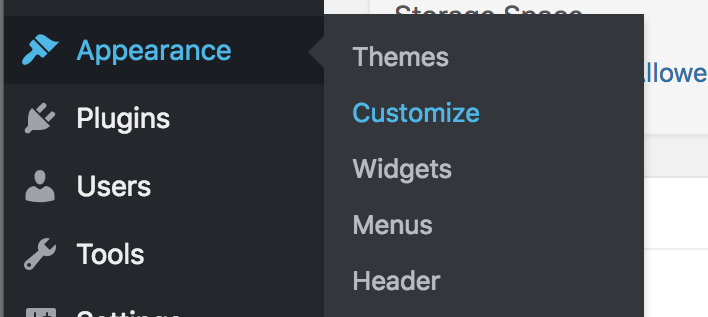
This WordPress site’s default theme is titled Twenty Seventeen, which is a responsive theme (automatically resizes to small devices or large screens) that beginning users can easily modify with the Appearance > Customizer tool. Read more about the theme features at https://codex.wordpress.org/Twenty_Seventeen
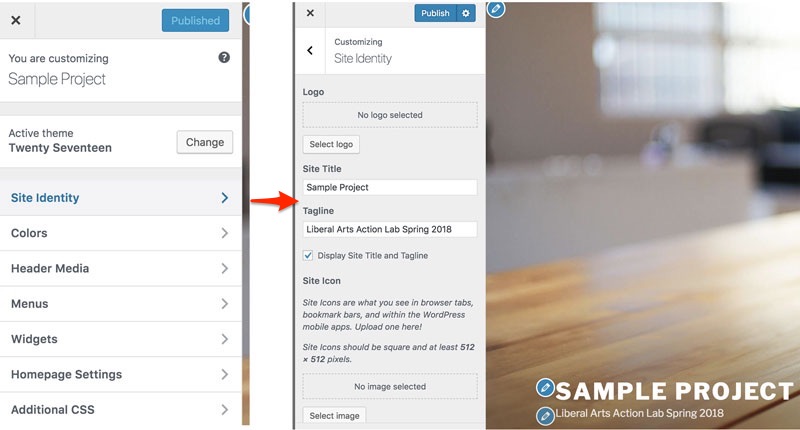
In the Customizer, select Site Identity to change the header or tagline text. Click the blue Publish button at the top to save your changes.
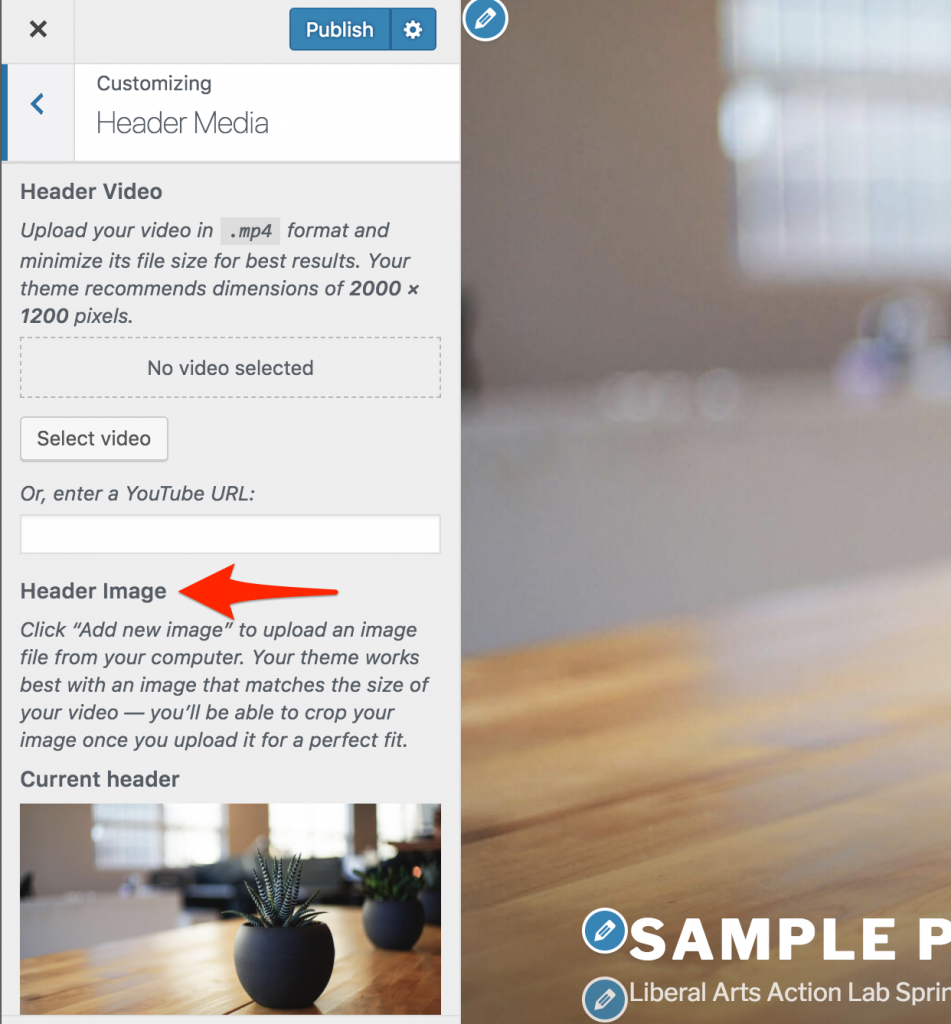
In the Customizer, select Header Media to upload a different image. Recommended images must be high-resolution: at least 2000 pixels wide by 1200 pixels high. You will be given the option to crop a larger image on upload. In theory, you could upload a header video via YouTube, but internet speed issues often produce a less-than-desirable outcome. Stick with images. Click the blue Publish button to save changes.
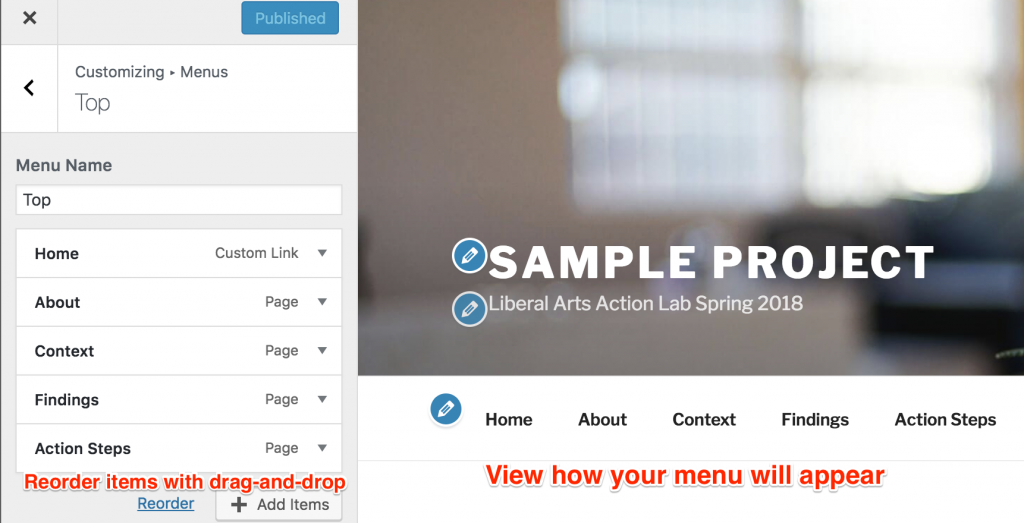
In the Customizer, select Menus to organize menu items on your front page. Select Create New Menu, choose its location (Top Menu), and give this menu a name (such as Top). Then click Next to Add Items to your menu, such as Pages (which you created above) or Custom Links (to point to an external web site).
Click items to add them to your menu, and reorder with drag-and-drop, then Publish to save changes.
Design your site to match your content and audience goals
Now that you can create sample WordPress content, reflect on the questions at the top of the page: What is your web content? Who is your intended audience? How can you design your site to match your content and audience goals? Explore these options:
- In WordPress, pages are best for stable content, while posts are better for chronological content (such as news or updates). Experiment by creating one or two posts, and display them in your Menu.
- Change the theme of your site at Appearance > Themes. This WordPress site default theme is Twenty Seventeen, but it also allows administrators to switch to other themes that display pages, posts, menus, and content in different ways. Whenever you change your theme, you may need to revisit the Customizer for theme-specific options.
- Set the home page to wider view: Follow these steps (or ask for help) to widen the page display when using the Twenty Seventeen theme.
- Appearance > Customize > Home Page Settings > Select a Static Page
- In Customizer, a new submenu will now appear: Theme Options
- Theme Options > 1 column (for wider view, rather than 2 columns)
- Front page sections – instructions to come
- Change your display name: Users > Your Profile > Insert name and change your Display Name, or Change Password

WordPress platforms and alternatives, and domain names
This workshop focuses on WordPress because it’s a widely-used open-source product that Trinity College staff actively support. But there are different types of WordPress platforms at Trinity and elsewhere, and each has pros/cons.
- Trinity Commons (http://commons.trincoll.edu) — Trinity students, staff, and faculty can request a site on this WordPress platform, which is easiest to use and supports numerous themes and plugins. But it’s not designed for users outside of the Trinity community. Also, your domain name will always appear as http://commons.trincoll.edu/your_username
- Trinity Domains (http://domains.trincoll.edu) — Trinity students, staff, and faculty can request an account on this more extensive (and a bit more complicated) platform to host their own WordPress sites, assign their own users, and in theory, use their own domain names (where http://yoursitename.com will appear in the browser)
- ReclaimHosting (http://ReclaimHosting.com) — Anyone can purchase their own domain name, and/or an account on their server to install WordPress, and receive all of the benefits offered by Trinity Domains. But you need to run it.
- Alternatives to WordPress: Some organizations prefer other web tools.
Who can answer WordPress questions at Trinity?
For faculty and academic projects, contact your instructional technologist at Trinity IT
For projects with Hartford partners, also contact Carlos Espinosa, Director of Trinfo Cafe
