Intro to WordPress on Action-Lab.org
Our goal is to create a mini-website for each Action Lab team project to share the results of our research at the end-of-semester digital poster event, and also to display on the public web. This tutorial is designed for students who have accounts on specific teams on the Action Lab multisite WordPress platform.
Compare with Action Lab sites created by past projects teams:
- Disability Employment
- High School Absenteeism
- Immigrant Welcoming
- Youth Diversity & Equity
- Inclusive Museums
- Hartford Small Businesses
- Anti-Racist Education
- Youth Development
- COVID-19 & Community Health Perspectives
- Housing & Environmental Justice
- Community Ownership
- Frog Hollow Storytelling
- Neighborhood Investment
- Energy Efficiency
- School Nutrition
- Greater Hartford Refugee Needs
- Limitless Fitness
- Black Heritage
- Neighborhood Communications
- Addiction Treatment
- HIV Community Health
- Arts Education
- Absentee Landlord
- Hurricane Maria: A Community Without Limits
- Youth Homelessness
- Youth Sports
- Culinary Careers
- Student Success
- Latinx Theater
- Cove Connection
- Food Stories in Hartford
- Opportunity Youth
- Home Ownership
- Hartford S.H.E.L.F. – Sustainable, Healthy Economical and Local Foods
- North Hartford Promise Zone Mapping
- Eviction
- Creative Placemaking
- PILOT Messaging
- Parent Engagement
The Action Lab staff have already created a site for each team, and an individual account and password for each member of that team. Every team member “administrator” access to their team site, meaning that you need to work together and avoid deleting each other’s work.
- Login to Action Lab WordPress site: https://action-lab.org/wp-login.php
- Username = FirstnameLastname (example: morganfinn). If we know your nickname, we used it.
- Password (instructor will tell you in class)
- IMPORTANT: This account is SEPARATE from your Trinity College username. If you have any questions or need help ask Communications and Program Assistant Morgan Finn.
Overview of sections below:
- Dashboard
- Link
- Image
- Video
- Footnote
- Table
- iFrame
- Modify Theme Appearance with Customizer
- Modify Menu
- Create Anchor Links for Long Pages
- Wide view
WordPress Dashboard: User Profile, Add Pages, and Visit Site
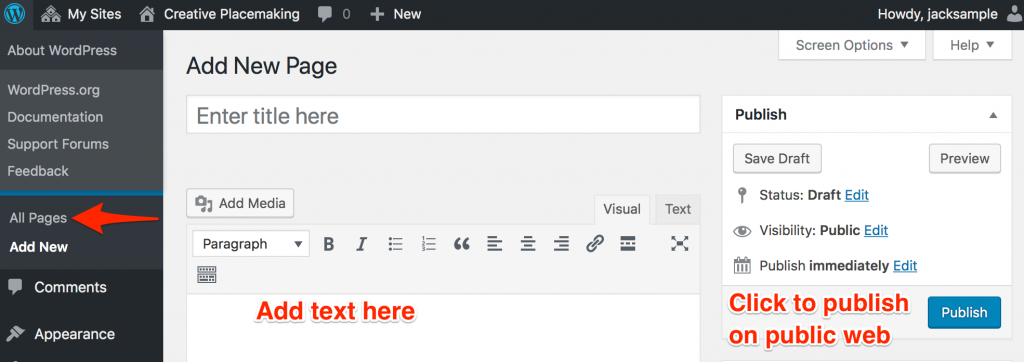
After you have logged into your account, explore these features of the Dashboard (back end):
Pages > All Pages. Create a new page, add a short title and text, and Publish.
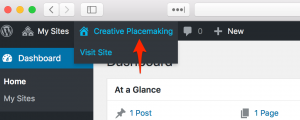
Float mouse over home symbol/site name and control-click to open “View Page” or “Visit Site” in a new tab. This allows you to make edits on the back end (Dashboard) and view changes on the front end (your public site). Always refresh your front-end browser tab to see the latest updates.
Add a link
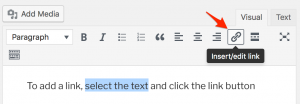
Inside your page editor, select text, click the link (chain) symbol, and insert web address
Add an Image
Inside your page editor, insert the cursor where you want the image to appear, click Add Media button, and select the image file (JPG or PNG or GIF). Add a title and caption and provide the source credit (and link). Remember that if you insert an image in academic work WITHOUT source credit, that is a form of plagiarism.
If you need to capture a screenshot of an image from your computer screen:
- Mac computers: hold down SHIFT-COMMAND-4; or download Skitch tool
- Windows: Start Button > All Programs > Accessories > Snipping Tool
See instructions for other devices at https://en.wikipedia.org/wiki/Screenshot
Add Video
Insert a YouTube or Vimeo URL directly into the page editor, like the one below, and it will automatically appear as an embedded video:
https://youtu.be/Gl3uIRYYUmI
See the result below. Remember to type a caption with source credit (and link) directly into the text below the video, since there is no caption box (as there are for media images).
Video by the Liberal Arts Action Lab (2018)
Embed a PDF
This WordPress site uses the Vanilla PDF embed plugin to display your PDF file as an embedded scrollable image in your WordPress page. If you have a copy of the PDF file:
- Upload the PDF to your WordPress Media Library, similar to an image
- In the Media Library, click the PDF icon to open its properties
- Copy and paste the long URL to the uploaded PDF file
- Paste the long URL directly into the WordPress editor window, like this:
https://action-lab.org/wp-content/uploads/2018/04/sample.pdf
See the sample result below. If you need to change the size of the PDF display, see more detailed instructions on the Vanilla PDF embed plugin website.
https://action-lab.org/wp-content/uploads/2018/04/sample.pdf
Insert a Footnote
The Action Lab website uses the Easy Footnotes plugin. Inside your text, simply enclose the footnote inside these bracket shortcodes:
Your text will appear as shown below, with a footnote number automatically displayed. Float over the cursor to see the note in a tooltip, or click to view the note at the bottom of the page.
Here’s my sentence 1
Insert a Table
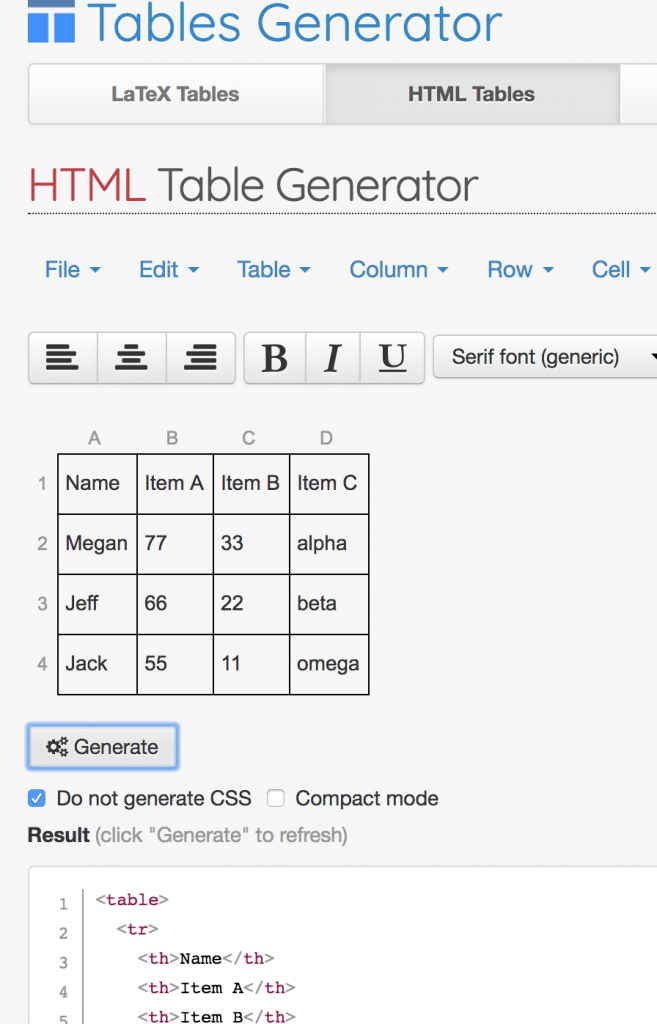
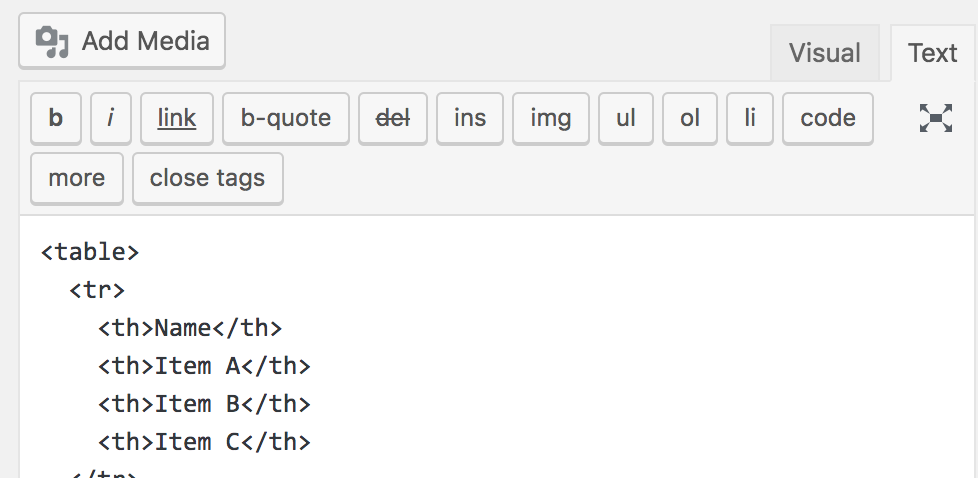
If you need to insert a table into WordPress, one quick option is to capture a screenshot of a spreadsheet (see above). But a better option is to generate the table in HTML code and paste into the WordPress text editor.
- go to http://tablesgenerator.com/html_tables
- design your table and type in content
- click the box: Do Not Generate CSS (to simplify the display)
- generate the table and copy the HTML code to your clipboard
Finally, in your WordPress editor, click the Text tab (next to the Visual tab), and paste the HTML code.
Your table will appear similar to the one below.
| Name | Item A | Item B | Item C |
|---|---|---|---|
| Megan | 77 | 33 | alpha |
| Jeff | 66 | 22 | beta |
| Jack | 55 | 11 | omega |
iFrame interactive charts and maps
This WordPress site uses the iframe plugin to display an interactive web page from one site (such as an interactive chart or map) inside your WordPress page or post. Learn more about the iframe concept at https://www.datavizforall.org/embed/
Copy the iframe embed code for your interactive chart or map. For example, see this screenshot of the embed code for a Social Explorer map:
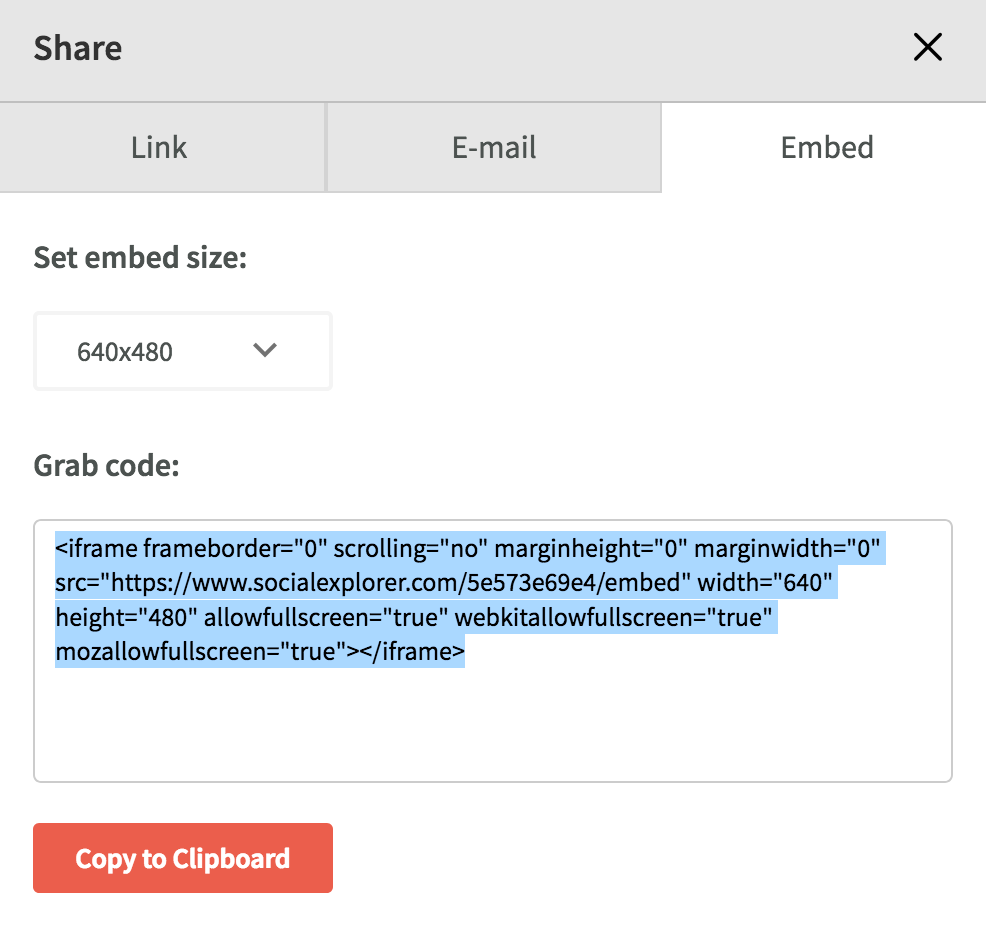
Paste the embed code into your WordPress editor window, and modify the iframe code as shown below:
- At the front end, replace the less-than symbol
<with an open bracket:[ - At the back end, remove the entire iframe end-tag, and replace the greater-than
>with a closed bracket:]
Your modified iframe code should appear similar to the image below:
Your iframe may contain some optional elements (such as frameborder, marginwidth, scrolling, etc.) The only required elements are the src (source url), along with the width and height (in pixels or percentage, such as “100%”). This means that you can also embed an interactive chart or map from another URL inside your WordPress site.
The end result should look similar to this embedded interactive map:
Modify Theme Appearance with Customizer
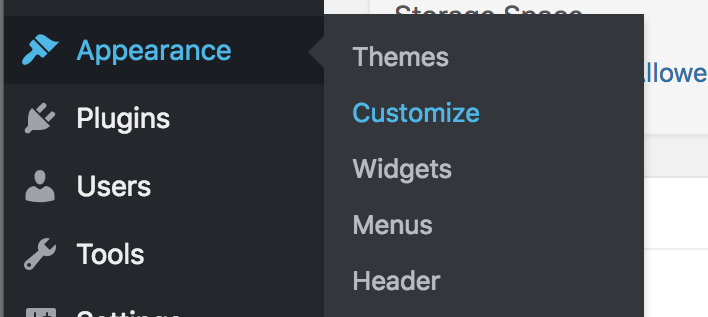
The Action Lab’s default WordPress theme is titled Twenty Seventeen, which is a responsive theme (automatically resizes to small devices or large screens) that beginning users can easily modify with the Appearance > Customizer tool. Read more about the theme features at https://codex.wordpress.org/Twenty_Seventeen
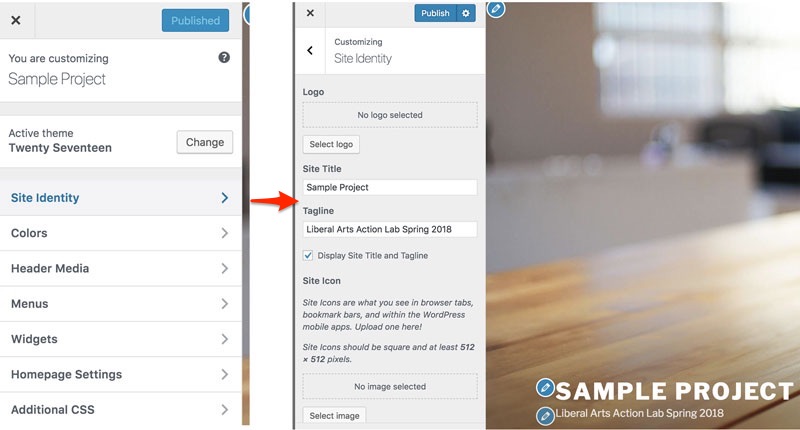
In the Customizer, select Site Identity to change the header or tagline text. Click the blue Publish button at the top to save your changes.
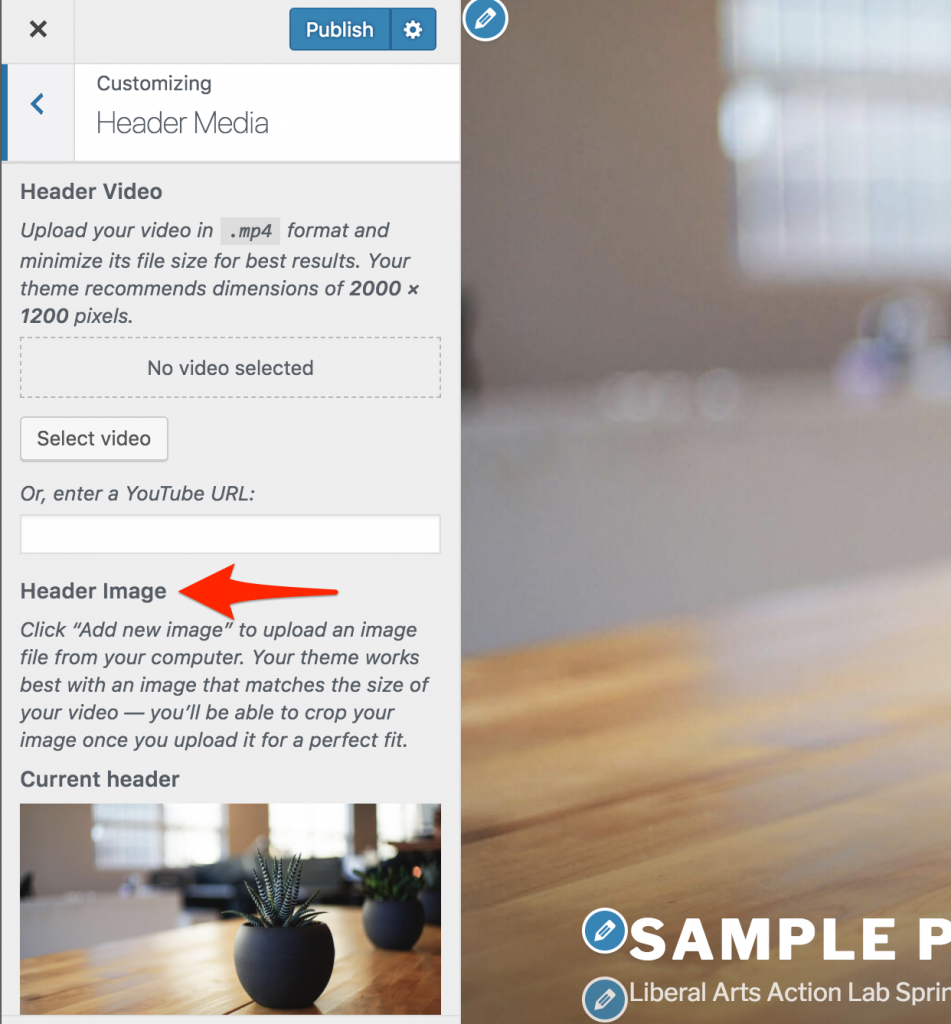
In the Customizer, select Header Media to upload a different image. Recommended images must be high-resolution: at least 2000 pixels wide by 1200 pixels high. You will be given the option to crop a larger image on upload. In theory, you could upload a header video via YouTube, but internet speed issues often produce a less-than-desirable outcome. Stick with images. Click the blue Publish button to save changes.
Modify the Menu
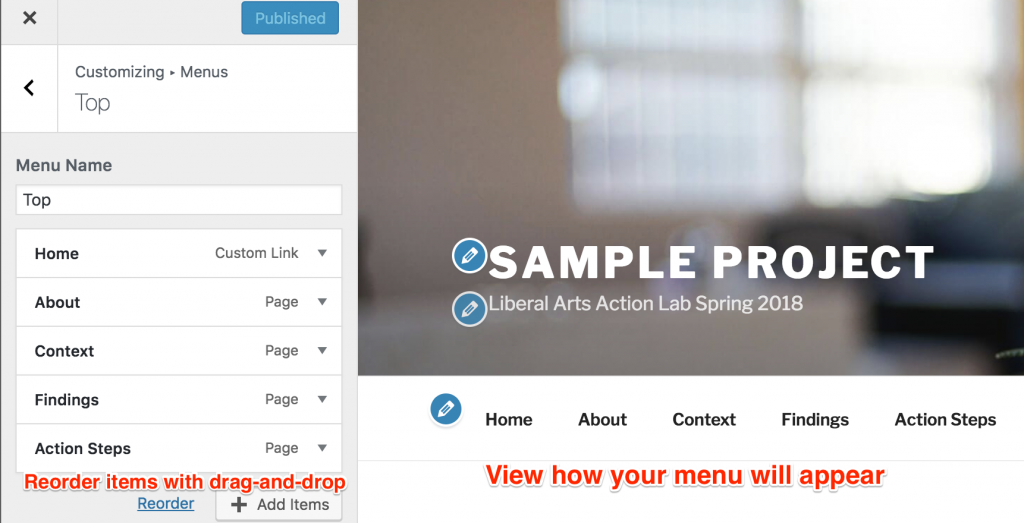
In the Customizer, select Menus to organize menu items on your front page. Select Create New Menu, choose its location (Top Menu), and give this menu a name (such as Top). Then click Next to Add Items to your menu, such as Pages (which you created above) or Custom Links (to point to an external web site).
Click items to add them to your menu, and reorder with drag-and-drop, then Publish to save changes.
Create anchor links inside long pages
If you have a long web page, consider using anchor links at the top (similar to Table of Contents) to point readers to specific sections further below. For example, the “Overview” of sections at the top of this page uses anchor links.
This website uses the Hash Link Scroll Offset plugin to make anchor link placements display properly, due to the fixed menu height of the theme. Before you begin, go to your Dashboard > Settings > General and set this to at least 60 pixels (roughly the height of the fixed menu), or a larger number if needed.
*more instructions to come — adapt from https://epress.trincoll.edu/webwriting/chapter/how-to-publish-on-wordpress/#anchors
Set the home page to wide view
Since these steps are complicated, your instructor has done this already for each Action Lab site:
- Appearance > Customize > Home Page Settings > Select a Static Page
- In Customizer, a new submenu will now appear: Theme Options
- Theme Options > 1 column (for wider view, rather than 2 columns)
Front page sections
to come
